GTM Server-Side: The Complete Guide
Updated: Saturday, January 20, 2024
The aim of this article is to give you all the keys you need to determine whether a server-side solution is right for your company, and also the steps you need to take to implement it.
You may be interested in a more specific guide:
What is Google Tag Manager client-side?
In its client-side version, Google Tag Manager collects data on your website and sends this data to marketing platforms such as Google Analytics, Google Ads or Facebook Ads via the browser.
flowchart LR
    subgraph Browser
        A[Your website]
        subgraph I[Google Tag Manager]
            F(GA4 tracking code)
            G(Google Ads tracking code)
            H(Facebook Pixel)
        end
    end
    C[Google Analytics 4 server]
    D[Facebook Ads server]
    E[Google Ads server]
    A --- I
    Browser -- google-analytics.com/collect --> C
    Browser -- www.facebook.com/tr --> D
    Browser -- googleadsservices.com/pagead/conversion/ --> E
The browser therefore sends requests directly to the marketing platforms you work with. Thanks to tracking codes, these platforms can deposit third-party cookies in the browser to identify the same visitor across several visits and/or link a visitor to an advertisement.
GTM Client-Side advantages
- relatively simple to set up (the biggest complexity lies in manipulating the Data Layer)
- the community has developed numerous tag and variable templates to make your life easier
- there are many tutorials on the Internet to help you out
- it’s what’s been done for a long time, so it’s easier to find these skills on the market (whether to recruit or outsource)
- Google Tag Manager Client-Side is completely free
GTM Client-Side drawbacks
- uses third-party cookies that will “normally” be removed in 2024
- tends to increase page load times, as you need to add a different tracking code for each marketing platform
- you have very little control over the data you send to marketing platforms (automatically collected user data, fingerprinting, etc.)
- requests sent to marketing platforms may be blocked by ad blockers
What is Google Tag Manager Server-Side?
Instead of sending requests to each server of the marketing platforms you use, you’ll only send requests to your own server. Your server will then communicate with the marketing platforms.
flowchart TD
    subgraph Browser
        A[Your website]
        subgraph I[GTM Client-Side]
            F(GA4 tracking code)
        end
    end
    subgraph J[Your server]
        subgraph K[GTM Server-Side]
            R[GA4 client]
            L[Google Ads tag]
            M[Facebook Ads tag]
            N[Google Analytics tag]
        end
    end
    R --> L
    R --> M
    R --> N
    Browser <-- HTTP --> J
    L -- googleadsservices.com --> O[Google Ads API]
    M -- graph.facebook.com --> P[Facebook Ads API]
    N -- google-analytics.com --> Q[Google Analytics API]
GTM Server-Side advantages
- reduces your website’s loading time (especially if you need to send data to many marketing platforms)
- gives you total control over what data is sent to marketing platforms, as your server acts as an intermediary (it dictates what data goes through and what doesn’t)
- fingerprinting becomes impossible with server-side tracking
- you’re less prone to ad blockers, as GTM and GA4 javascript libraries in particular can be downloaded from your server
GTM Server-Side drawbacks
- you have to pay to host your server in the cloud
- managing a server in the cloud requires additional skills (setup, monitoring, scaling, etc.)
- few tag templates are currently offered by the community
Client-Side VS Server-Side required skills
mindmap
  root[Client-Side vs Server-Side required skills]
    [Client-Side]
      :::blue
      (Javascript)
        (Variables)
        (Functions)
        (JSON)
      (Cookies)
      (CSS selectors)
      (DOM HTML)


    [Server-Side]
      (HTTP)
        (Requests and responses)
        (Cookies)
        (JSON)
        (Logs)
      (Cloud)
        (DNS)
        (Load balancing)
        (Resource monitoring)
Frequently Asked Questions
Will my Client-Side configuration be obsolete if I switch to server-side?
No. Your client-side implementation can be reduced to a single type of tag (e.g. GA4) that will send the data to your server, reducing your website’s loading time because you’ll have fewer tags. All your triggers will still be useful. If you’ve set up a Data Layer, this doesn’t have to go to waste either, the client container will keep on using it.
Do I have to change my tag implementation plan or measurement strategy if I switch to server-side?
You can update your client-side tag implementation plan if you remove some tags. You can also create a tag implementation plan for the server-side. On the other hand, the events you measure will remain the same. Moving to the server-side changes the way data is fed back to marketing platforms from a technical point of view, but in no way alters your measurement strategy.
Do I still need to obtain consent from my visitors if I switch to server-side?
Yes. GTM server-side is just a different technical implementation, but this doesn’t change the current legislation.
Create a server container in GTM with Cloud Run
Provisioning a new server container
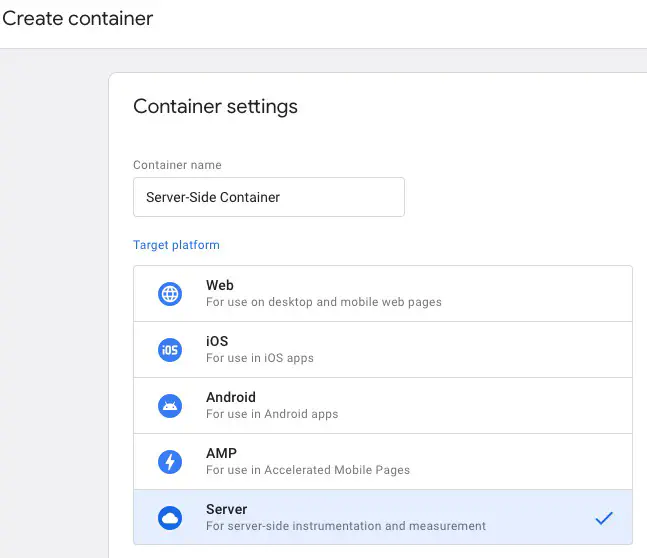
In Google Tag Manager, create a new container and choose Server as the target platform.
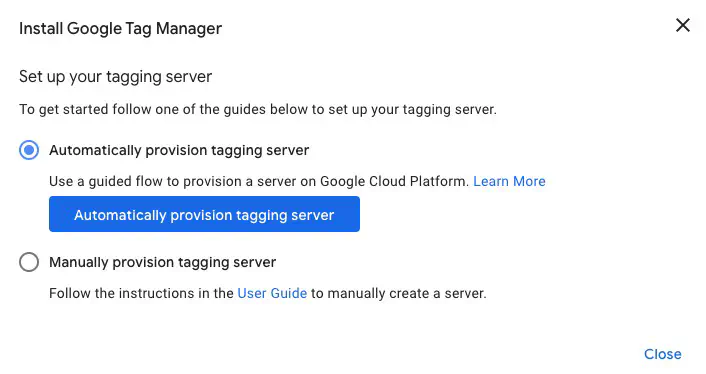
Once you’ve created your container, Google Tag Manager will ask you how you’d like to configure your server. You can do this either automatically (this will set up a server for you in Google Cloud) or manually (this gives you the option of configuring your server yourself).
To make things easier, we’ll choose automatic provisioning.
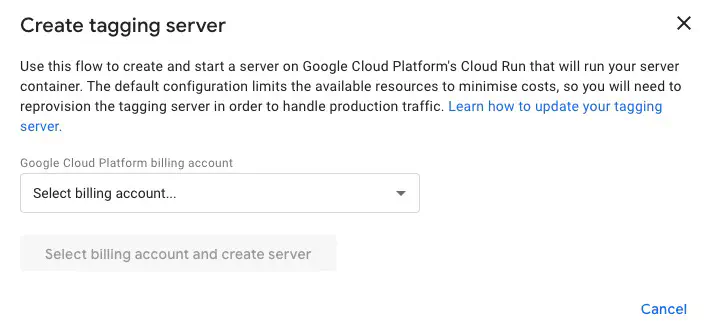
At this stage, if you don’t have a billing account in Google Cloud, you’ll need to create one.
Once this is done, select your billing account and create your server.
Creating the server will take a few minutes…
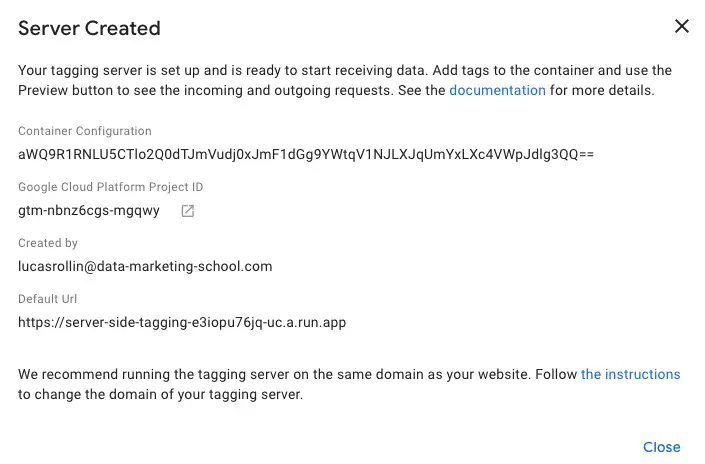
Once the server has been created, two important pieces of information are displayed:
- The Google Cloud project in which your server is located
- The default URL for sending requests to the server
Link your domain name to the server container
Linking your domain name will enable cookies to be deposited in a first-party context. This is one of the advantages of server-side tracking, so this step is important.
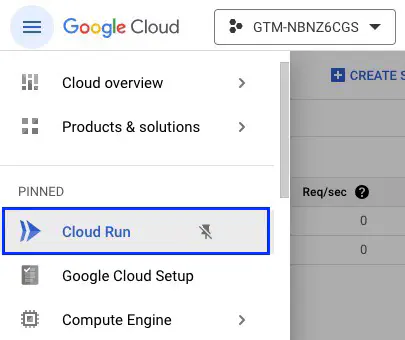
Go to your Google Cloud project then Cloud Run.
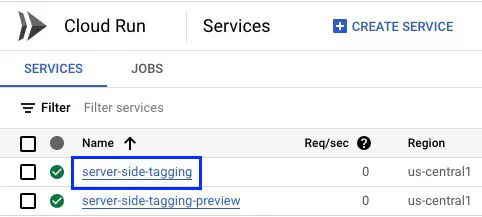
This brings you to the overview of your Cloud Run services.
Here you can see that there are two services:
- the tagging server
- the preview server
With this configuration, test requests will be sent to the preview server and real requests will be sent to the main tagging server.
To link your domain name, click on the main tagging server service:
Then, go to the Integrations tab.
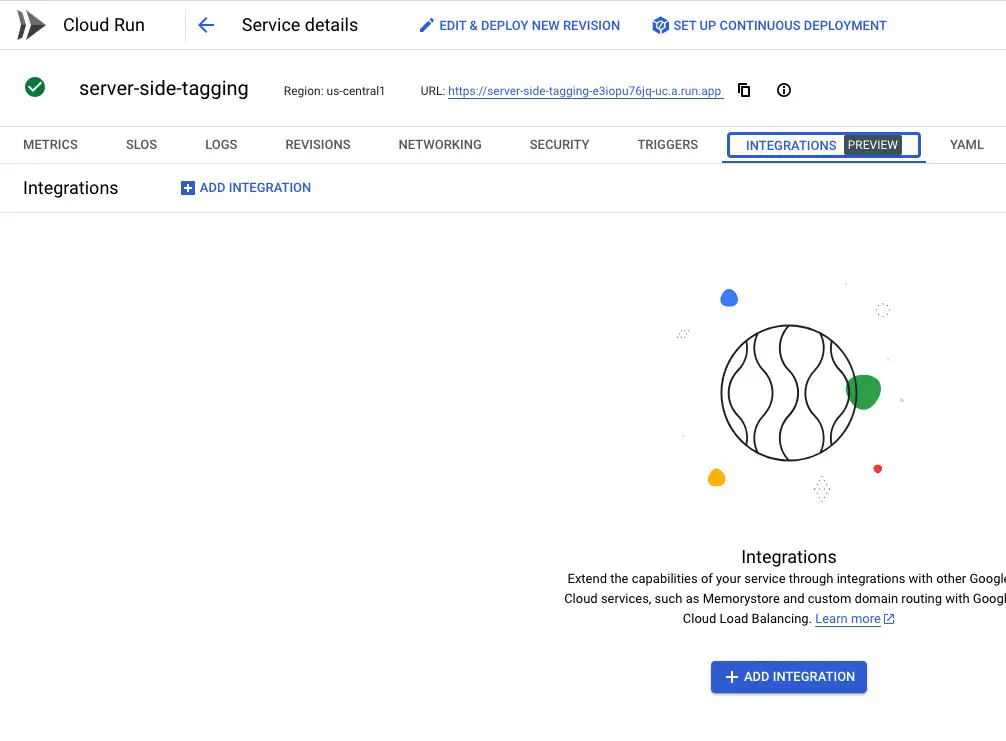
Click on Add integration then select Custom domains.
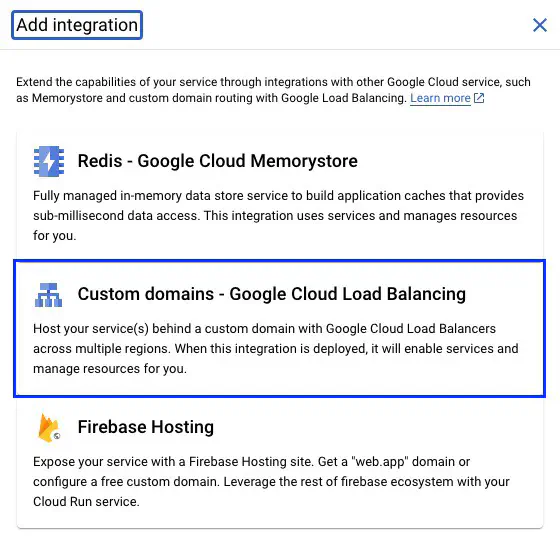
Then enter your sub-domain and activate the necessary APIs.
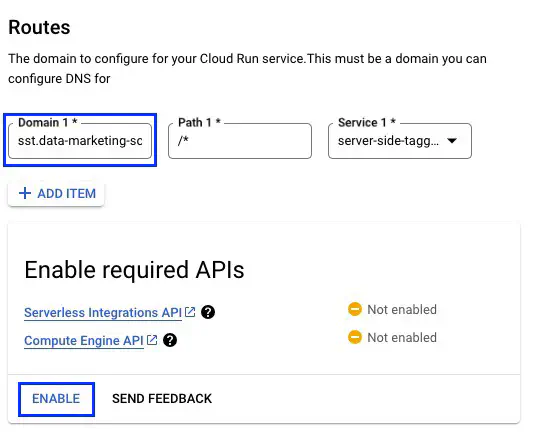
Once the APIs have been activated, click on the SUBMIT button.
Add your DNS record
In the Custom domain integration you’ve just created, a window shows you how to configure your DNS record.
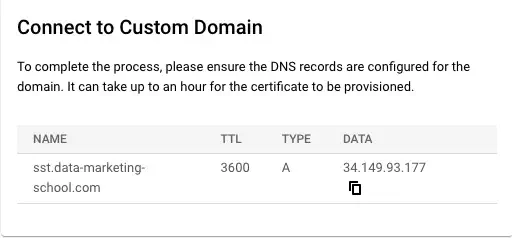
For my part, I’m going to do this configuration on Cloudflare but this depends on the DNS host you use.

Depending on your DNS host, the link of the domain name with your Cloud Run tagging server and the generation of the SSL certificate may take between 10 minutes and 24h.
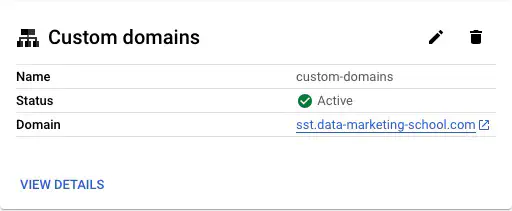
Once this is complete, the integration status will change to Active.
Test the server with your domain name
Before testing your domain name, you’ll need to modify the server container configuration to indicate the new URL of your server.
To do this, go to Admin then Container settings. Here, change the server container URL.
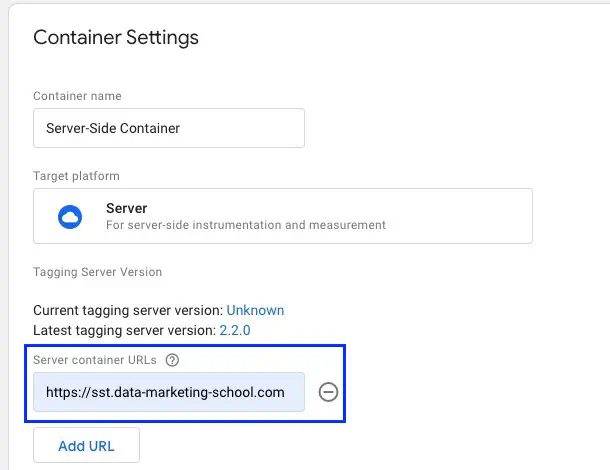
Then, activate the preview mode in your GTM server container.

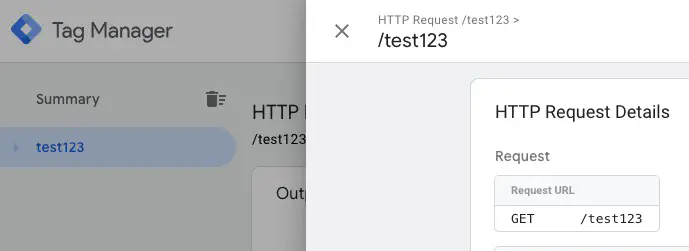
At the same time, enter your server’s domain name (in this case https://sst.data-marketing-school.com) in your browser. You should get a 400 HTTP error.

Even if you get an error at this stage, this means that the server has responded and is running. You can check this in GTM Server-Side’s preview mode.
Congratulations, you’ve completed your server’s Cloud configuration.
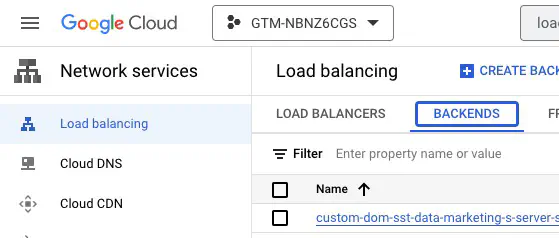
Enable logging
On Google Cloud, go to the Load balancing section and click on the backends tab. Here you should see your server.
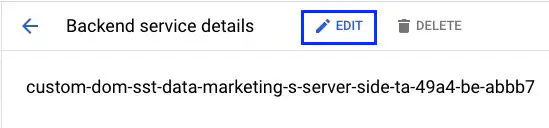
Click on the backend service corresponding to your server, then on Edit.
Scroll down to the Daily section, then edit the settings as follows.
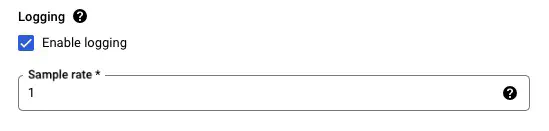
Then, click on the Update button.
Congratulations, you’ve activated logging.
Deploy Cloud Run server to production
Once you’re happy with your Server-Side configuration, you need to put your server into production before sending real traffic.
Go to the settings of your Cloud Run instance and scroll down to the Autoscaling section.
The default settings are as follows:
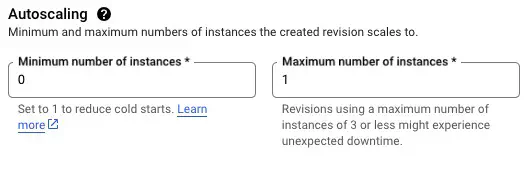
Google’s recommended settings for going live are between 2 and 10 instances. Cloud Run instances will be added or removed according to traffic load.
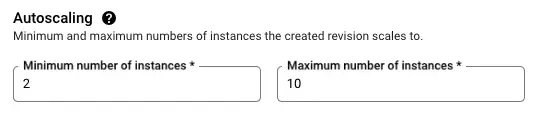
Then, click on Deploy.
Delegate cloud management
Here are 3 services that manage the entire infrastructure/cloud of your Server-Side implementation from A to Z:
- https://www.addingwell.com/ (free plan with up to 100 000 requests)
- https://stape.io/ (free plan with up to 10 000 requests)
- https://taggrs.io (free plan with up to 10 000 requests)
Didn't find what your were looking for?
Get help from the Data Marketing Club
Related posts

Google Ads website phone call conversion tracking with Google Tag Manager
When you display your phone number on your website, your leads can copy the phone number to call you without necessarily interacting with your website.
3 min read

Track Hubspot Meetings iframe with GTM
Hubspot lets you to integrate a meeting scheduler on your website through an iframe. Here is how to trigger an event when a new meeting is booked.
3 min read

Google Ads Conversion Tracking with Google Tag Manager
Tracking conversions will enable Google Ads' machine learning algorithms to fully understand the typical lead who performs the desired action, and thus optimize ad delivery so that this conversion action happens more and more.
5 min read

dataLayer push: definition and examples
The dataLayer is a JavaScript array that is grafted on your website to expose data and/or user behavior (events) to Google Tag Manager.
3 min read

Consent Mode in Google Tag Manager
Consent Mode has been introduced in Google Tag Manager to provide a hybrid solution for sending not PII without consent and PII with consent.
2 min read

Track Single Page Applications with GTM and GA4
3 ways to track Single Page Applications (SPA) with Google Tag Manager (GTM) and Google Analytics 4 (GA4).
5 min read