Title here
Summary here
You work in Tracking - Analytics - Data Viz - Data Eng - Media Buying?
JOIN US ON DISCORDUpdated: Wednesday, April 30, 2025
| ✅ Arguments FOR Matomo | Details |
|---|---|
| Privacy | GDPR compliant, consent-exempted data collection possible (under a specific configuration) |
| Data ownership | You retain full control of the data collected |
| Open-source and customizable | Modifiable code, plugins can be added |
| No data sampling | Complete data analysis without extrapolatio |
| Flexible hosting (cloud or self-hosted) | Choice of hosting mode depending on security needs |
| ❌ Arguments AGAINST Matomo | Detail |
|---|---|
| Less advanced functionality | Lack of predictive tools and advanced visualization |
| Less intuitive interface | Less ergonomic for non-technical users |
| Installation and maintenance required | Self-hosting requires technical skills |
| Less native integrations | Manual integration with other tools (Google Ads, etc.) |
| Potentially high costs (in the cloud) | Traffic-based pricing, can become expensive |
I’ve created 5 tag templates (available in the GTM gallery) to help you send your data to your Matomo instance from Google Tag Manager :
In this tutorial, I will detail the client-side implementation (tags 1 to 4). If you’d like to configure Matomo as server-side (tag 5), you can consult this blog post.
Go to the Google Tag Manager gallery and add Data Marketing School’s Matomo Analytics - Configuration tag to your workspace.
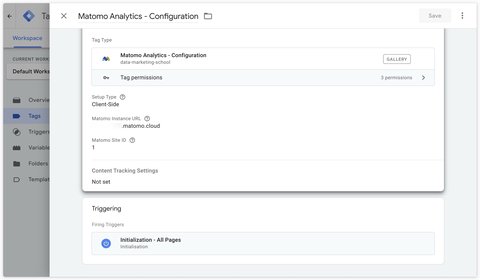
At this stage, you have 3 items to configure:
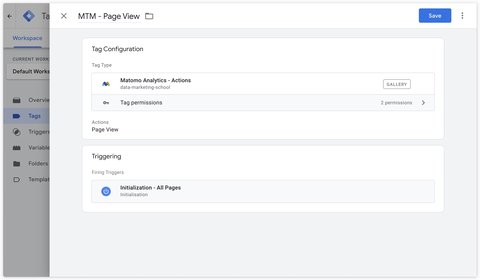
This tag sends all pages viewed to Matomo.
Page views are sent automatically via the configuration tag. If you wish to manage the sending of page views with a separate tag, you can do so with the Matomo Analytics - Actions tag.
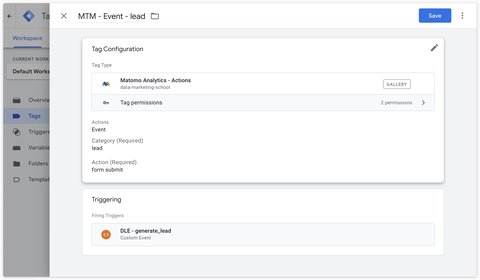
In the Matomo Analytics - Actions tag, select the Event action.
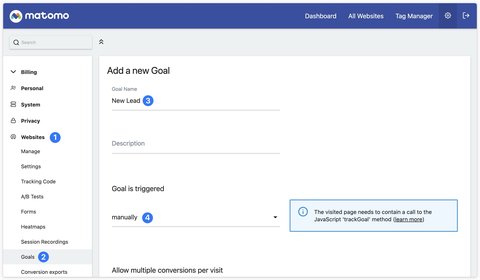
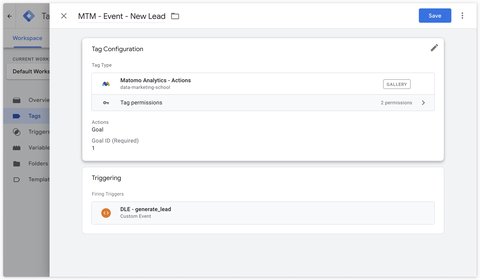
To send a goal to Matomo, you must first create it in the interface.
Go to Websites > Goals then click on Add a new Goal.
Once your goal has been created, you can retrieve its identifier.

Once you’ve retrieved your goal identifier, all you have to do is specify it in the Matomo Analytics - Actions tag by selecting the Goal action.
To activate automatic outbound link tracking, you can check the Enable Link Tracking box in the Other Settings section of the Matomo Analytics - Configuration tag.
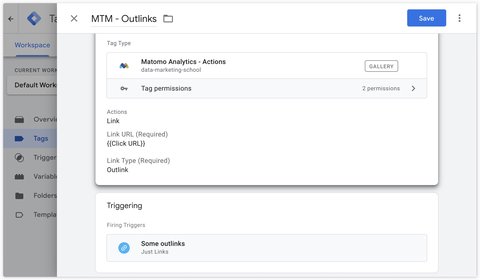
To track outbound links manually (for example, to track only one of several outbound links, but not all of them) you can use the Matomo Analytics - Actions tag and select the Link then Outlink action as Link Type.
To enable automatic tracking of downloads, you can check the Enable Link Tracking box in the Other Settings section of the Matomo Analytics - Configuration tag.
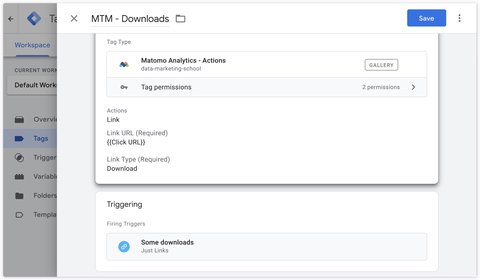
To track outgoing links manually (for example, to track only one of several outgoing links, but not all of them) you can use the Matomo Analytics - Actions tag and select the Link then Download action as Link Type.
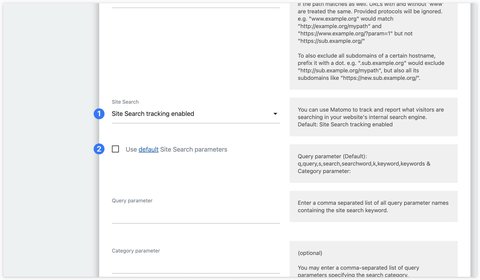
By default, Matomo tracks searches if they generate a page reload and if the results page contains one of the following query parameters:
qqueryssearchsearchwordkkeywordkeywordsTo track searches on your site, you must first activate this feature in Matomo. To do this, go to Websites then Manage.

Then click on the icon to edit your website. Scroll down to the Site Search section. Activate Site Search and uncheck the Use default Site Search parameters box.
With e-commerce tracking, Matomo can collect and display detailed statistics on :
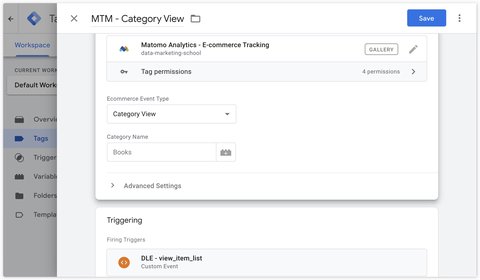
To track category views, you can use the Matomo Analytics - Ecommerce Tracking tag and select Category View as the Ecommerce Event Type.
If you leave the Category Name field empty, the tag will default to the value ecommerce.items.0.item_category if present.
To track product views, you can use the Matomo Analytics - Ecommerce Tracking tag and select Product View as the Ecommerce Event Type.
The other fields are optional and will fetch the following default values:
ecommerce.items.0.item_idecommerce.items.0.item_categoryecommerce.items.0.item_name.ecommerce.items.0.price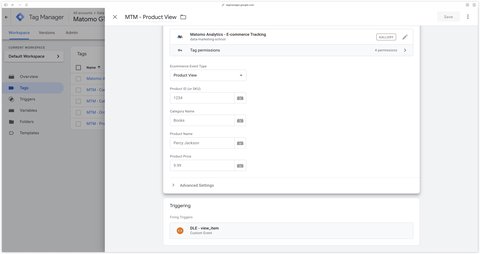
To track cart updates, you can use the Matomo Analytics - Ecommerce Tracking tag and select Cart Update as the Ecommerce Event Type.
By default, this tag will fetch the ecommerce.items array, but you can modify this behavior in the Override items array section.

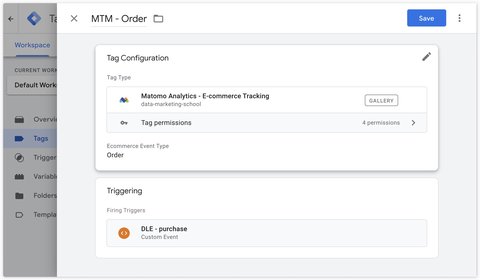
To track shopping cart updates, you can use the Matomo Analytics - Ecommerce Tracking tag and select Order as the Ecommerce Event Type.
By default, this tag will fetch the following variables from the ecommerce dataLayer:
ecommerce.transaction_idecommerce.valueecommerce.taxecommerce.shippingecommerce.discountBy default, this tag will use the ecommerce.items array, but you can modify this behavior in the Override items array section.
Congratulations, you’ve completed the configuration of Matomo Analytics with Google Tag Manager.
If you encounter any problems in configuring your tags, or if you have any feedback (positive or negative) or suggestions for modifications to share with me, you can do so in the comments below.

Learn how to set up custom scroll thresholds with Google Tag Manager and Google Analytics
Google Tag Manager, Google Analytics
4 minutes
How to accurately track Hubspot Forms with Google Tag Manager
Google Tag Manager, Hubspot
2 minutes
Guide to tracking clicks and links with Google Tag Manager and GA4.
Google Tag Manager, Google Analytics
7 minutes