Title here
Summary here
You work in Tracking - Analytics - Data Viz - Data Eng - Media Buying?
JOIN US ON DISCORDUpdated: Tuesday, August 13, 2024
Setting up Matomo in server-side with Google Tag Manager gives you a user-friendly working environment and all the benefits of server-side.
Looking for a more generic guide on server side tagging?
=> Google Tag Manager Server-Side Tagging: Tutorial
If you’re already using Matomo in client-side, you may have noticed that ad blockers block requests that include the text matomo.
Setting up Matomo as a server-side application enables you to bypass ad blockers and collect a greater amount of data on your users.
Loading a single browser-side script reduces the loading time of your website’s pages. By the way, this is an important metric used by Google to rank pages in search results.
In large organizations, mastering data flows is essential to comply with security standards and legislative constraints.
When you install scripts directly in the browser (client-side), marketing platforms can collect what they want, and you have no control over it. In a server-side configuration, the data first passes through your server before being sent to the platforms. You’re in control of the flow, and can manipulate it as you see fit.

It is recommended to use a GA4 collection if you are using GA4, Google Ads or Floodlight tags on the server side to ensure proper operation of Consent Mode V2.
=> If you wish to use a GA4 collection, please follow the Addingwell documentation.

This method is interesting if you don’t want to install a Google script on your website and you don’t need to manage Consent Mode.
If you’d like to use a Matomo collection, you can read this documentation.
Click here to download the Matomo client.
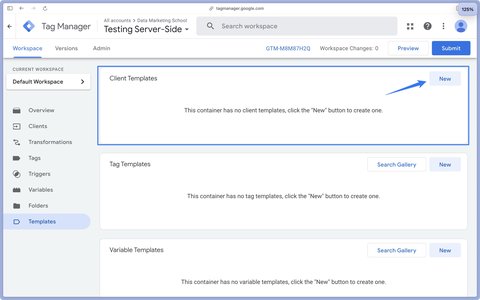
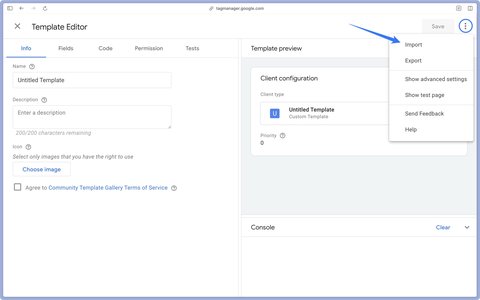
Go to Google Tag Manager Server-Side and then to the Templates section.
Then import the file you uploaded earlier.
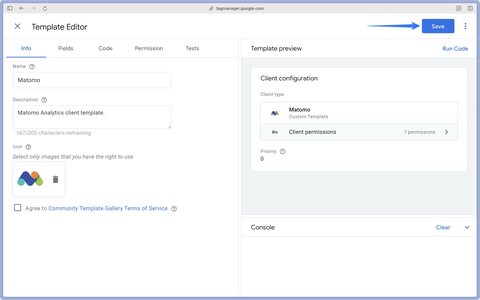
Then click Save in the top right-hand corner.
In the Clients section, click on New.
Select the Matomo client.
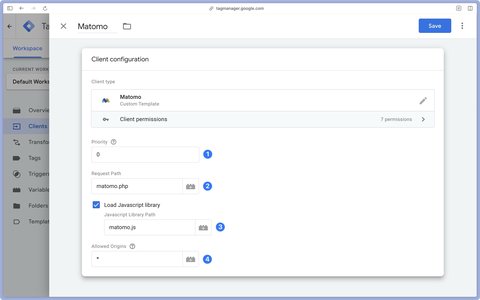
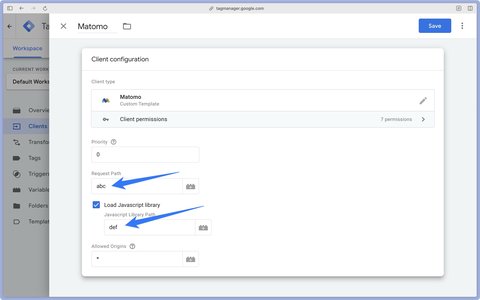
Priority: if you use several clients, the client with the highest priority runs first on a given request. As a reminder, a request can only be claimed by a single client.
Request Path: the path you will call when sending a Matomo request to your server. The default path is matomo.php, but it is strongly recommended that you change it to bypass ad blockers.
JavaScript Library Path : the path you’ll call to deliver the Matomo tracking script. The default path is matomo.js but it is strongly recommended that you change it to bypass ad blockers. Cache time: 8 min.
Allowed origins: list here the domain names that are allowed to call your server. This prevents another website from using your server to load the Matomo JavaScript library, for example.
For the example, I’ll choose abc as Request Path and def for Matomo’s JavaScript Library Path.
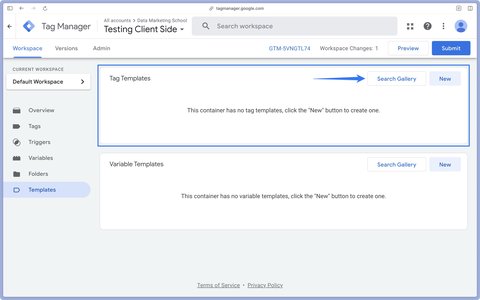
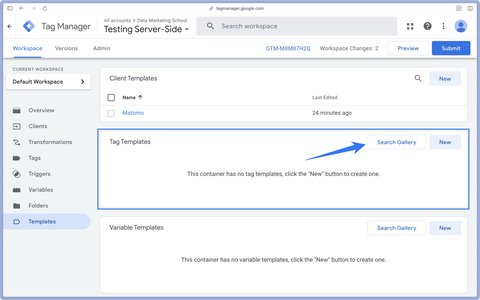
Go to the Templates section of Google Tag Manager WEB. Then click on Search Gallery in Tag Templates.
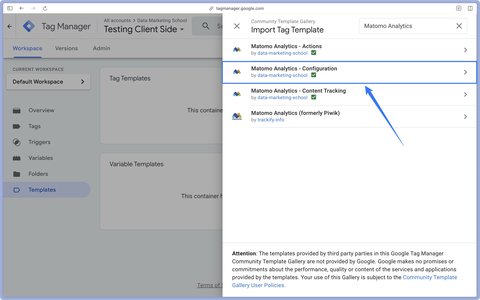
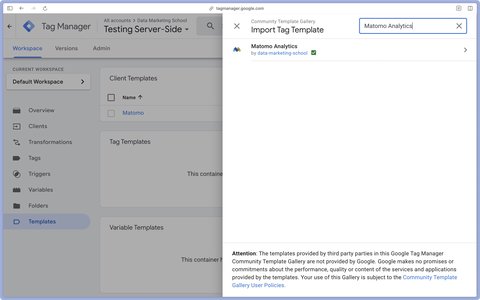
Import the Matomo Analytics - Configuration tag from Data Marketing School.
In the Templates section of GTM, click on the tag Matomo Analytics - Configuration.
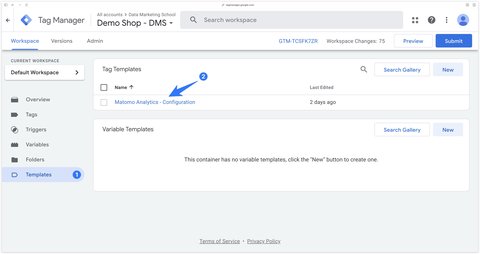
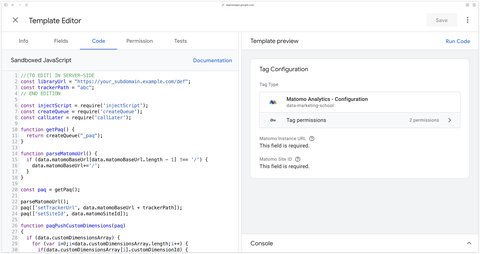
Click on the tag, then go to the Code section.
Modify the trackerPath and the libraryUrl here to match what you configured in the Matomo client. In our example:
//[TO EDIT] IN SERVER-SIDE
const libraryUrl = "https://your_subdomain.example.com/def";
const trackerPath = "abc";
// END EDITION
Then, in the Permissions tab and under Inject Scripts, you must add the URL:
https://your_subdomain.example.com/def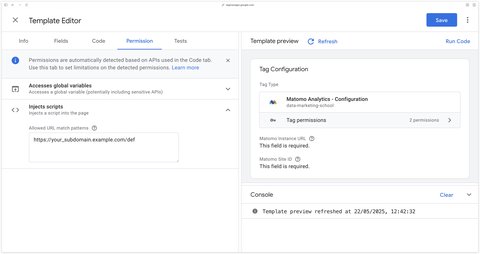
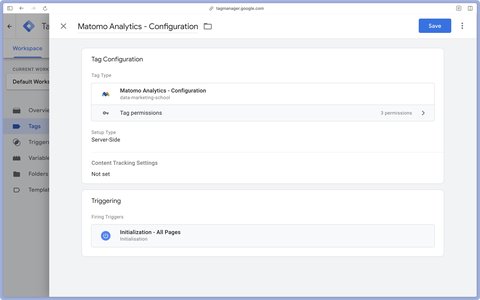
In Google Tag Manager WEB, go to the Tags section > New. Then select the previously imported tag.
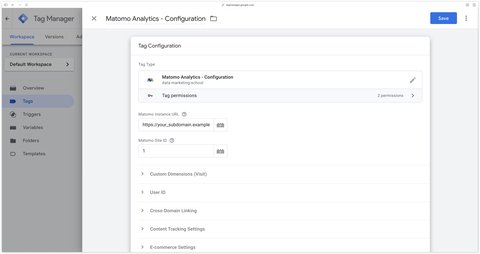
https://your_subdomain.example.com.This tag should be triggered as soon as possible in your container. We’ll therefore use the Initialization - All Pages trigger.
Go to the Templates section of Google Tag Manager Server-Side. Then click on Search Gallery in Tag Templates.
Import the Matomo Analytics tag from Data Marketing School.
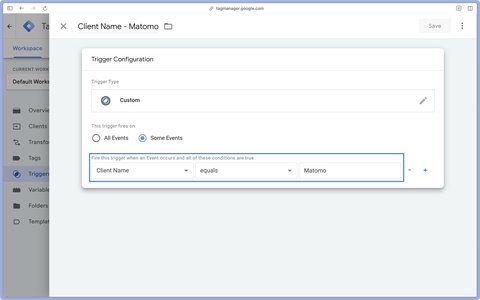
Go to the Tags > New section. Then select the previously imported tag.

<your_subdomain>.matomo.cloud).On the server side, the tag must be triggered for all Matomo client requests. We’ll therefore use a Custom trigger.

Set up Matomo Analytics with my Google Tag Manager tag templates.
Matomo, Google Tag Manager
5 minutes

I'm going to show you how to set up Google Ads tracking on Google Tag Manager Server-Side.
GTM Server-Side
6 minutes

The User ID feature is used by most web analytics tools on the market to uniquely identify a logged-in visitor across multiple devices.
Matomo
3 minutes