Install Meta Pixel with Google Tag Manager
Updated: Wednesday, May 1, 2024
Get the Meta Pixel ID
To set up the Meta Pixel on Google Tag Manager, we need to retrieve its ID from Meta’s Business Manager.
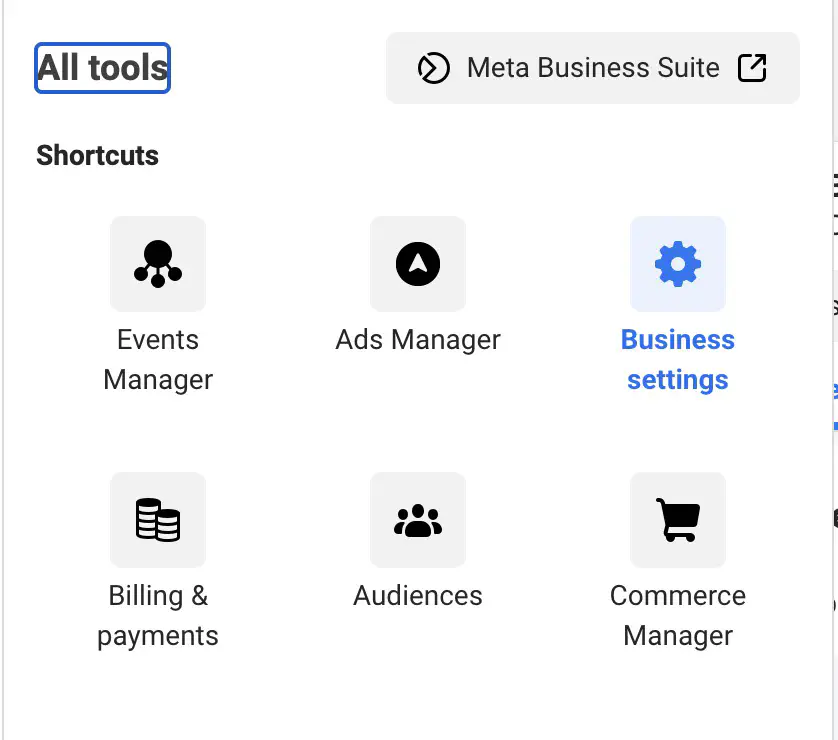
To get started, go to https://business.facebook.com.
Go to Business settings then Data sources > Datasets.
If you don’t already have a pixel, you’ll need to create one.
Once the pixel has been created, click on its ID to copy it.
Install the Meta Pixel base code with Google Tag Manager (PageView event)
In Google Tag Manager, create a new tag and select this template from the community gallery:
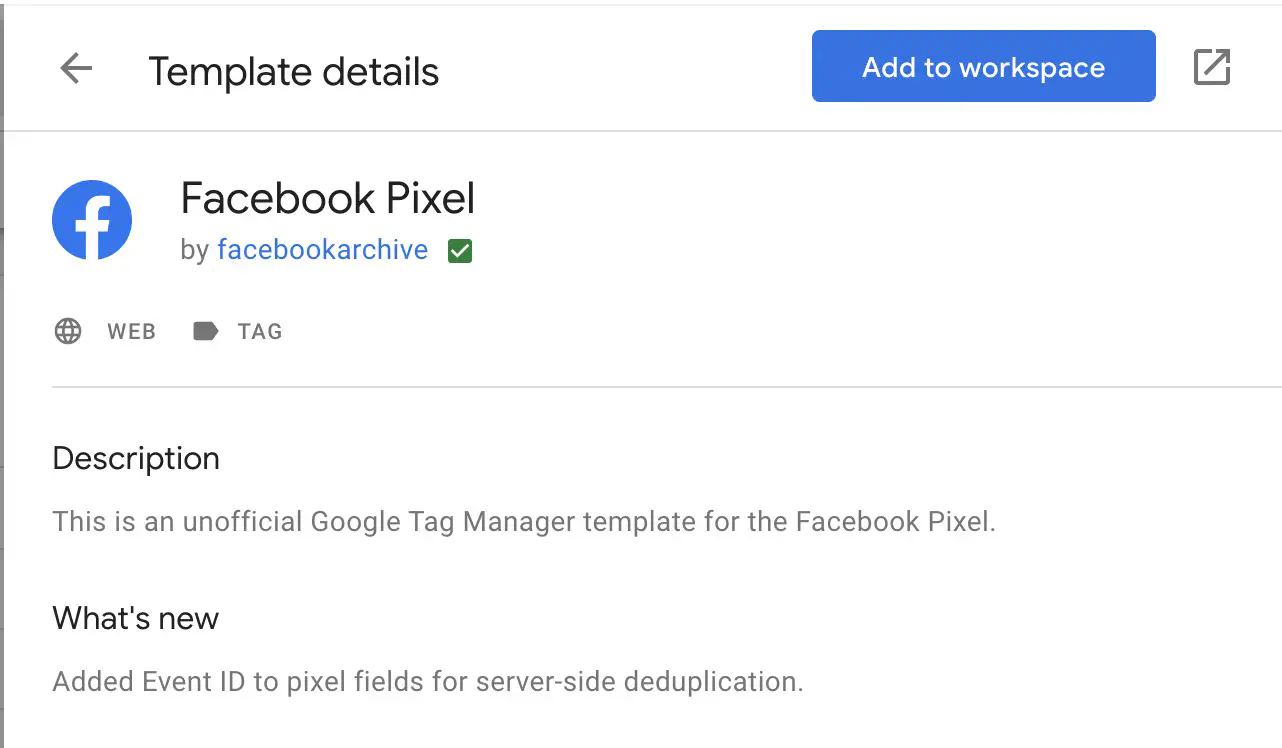
You can then configure the tag by entering the following information:
- your pixel identifier
- the event you wish to send (here, select the standard PageView event)

As a reminder, this configuration corresponds to the following code:
<!-- Meta Pixel Code -->
<script>
!function(f,b,e,v,n,t,s)
{if(f.fbq)return;n=f.fbq=function(){n.callMethod?
n.callMethod.apply(n,arguments):n.queue.push(arguments)};
if(!f._fbq)f._fbq=n;n.push=n;n.loaded=!0;n.version='2.0';
n.queue=[];t=b.createElement(e);t.async=!0;
t.src=v;s=b.getElementsByTagName(e)[0];
s.parentNode.insertBefore(t,s)}(window, document,'script',
'https://connect.facebook.net/en_US/fbevents.js');
fbq('init', '946789763753044');
fbq('track', 'PageView');
</script>
<!-- End Meta Pixel Code -->
Click on Save and publish your changes in your container.
Setting up standard Meta Pixel events with Google Tag Manager
Now that the basic code is set up (with the standard PageView event), you can track other standard Meta events that may correspond to user behavior on your site.
You’ll find all standard Meta events on their official documentation.
Here we’ll install the Purchase event for the example.
Unlike the PageView event, the Purchase event has two mandatory parameters: currency and value.
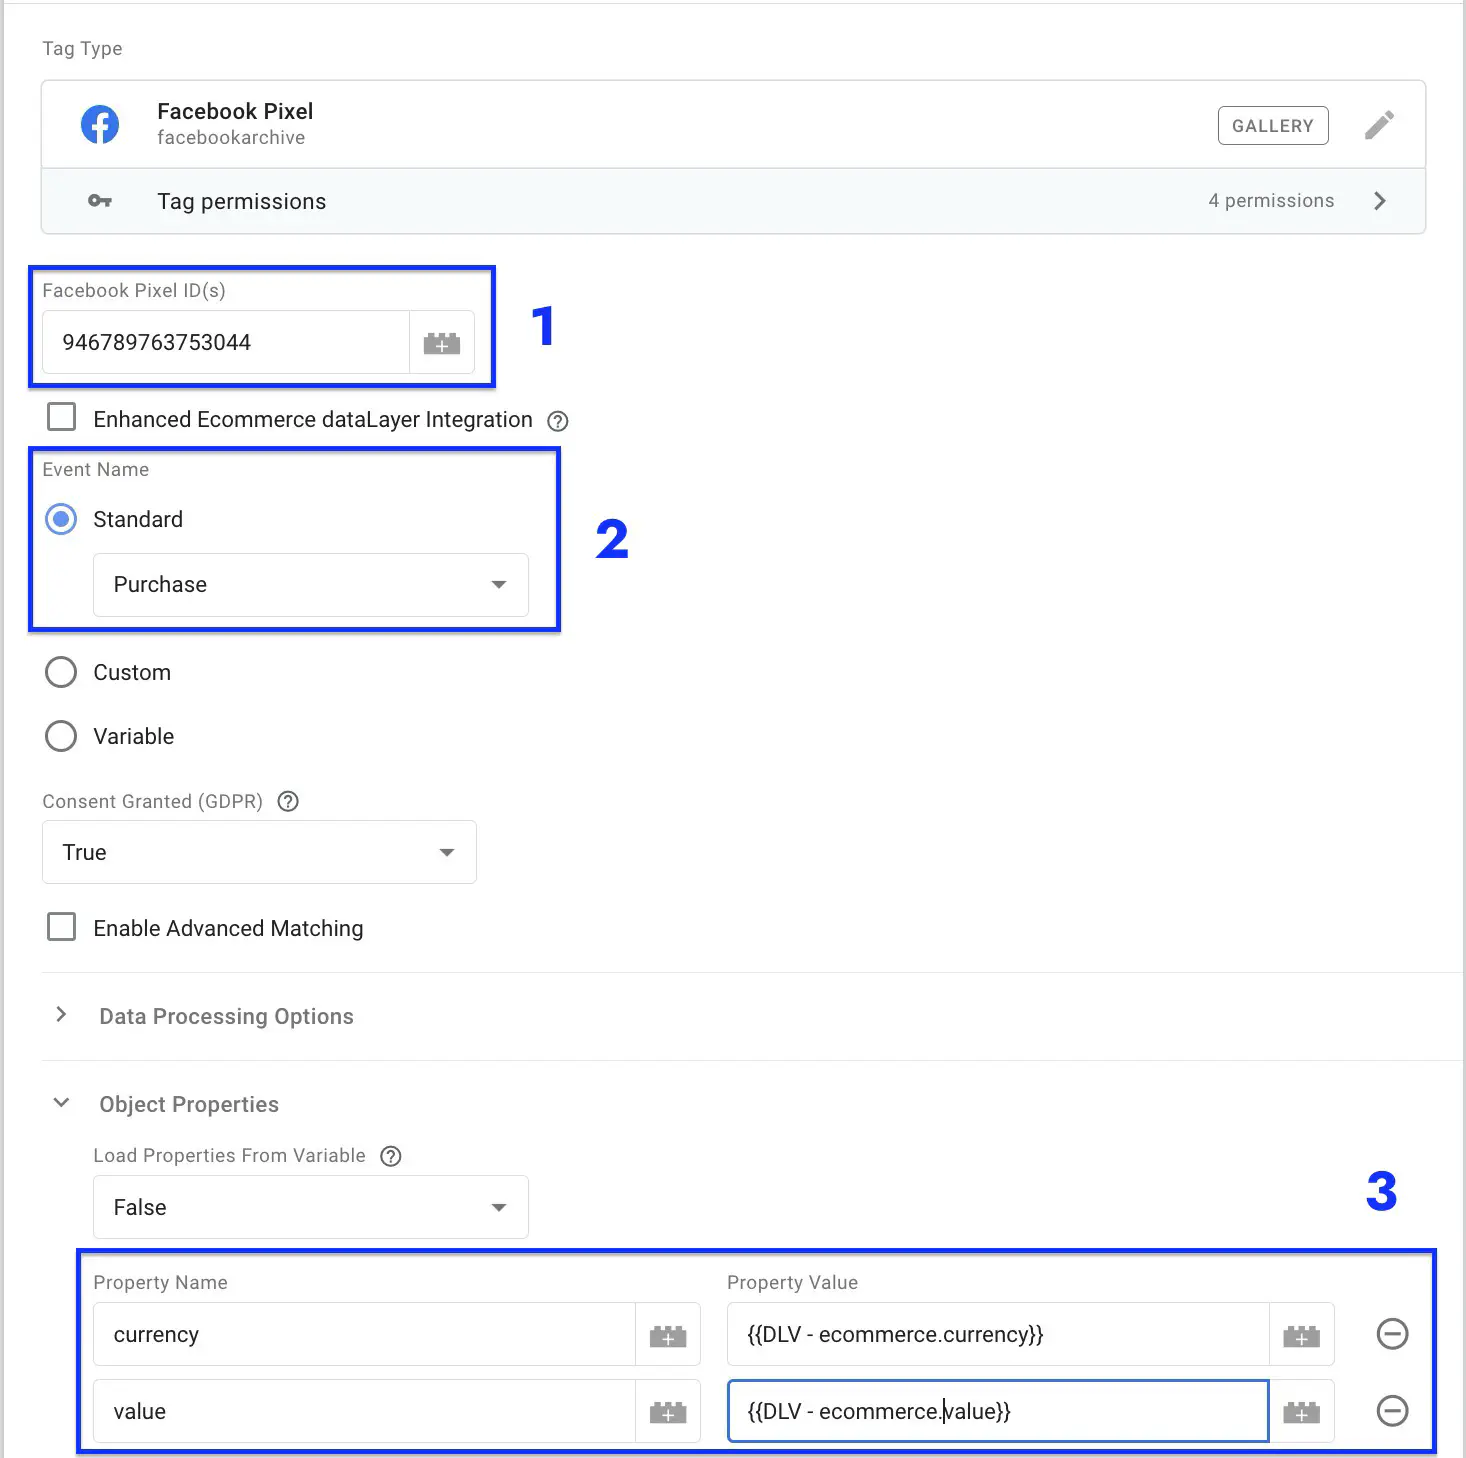
Once you’ve configured the tag using the steps above, you can save it and publish your changes.
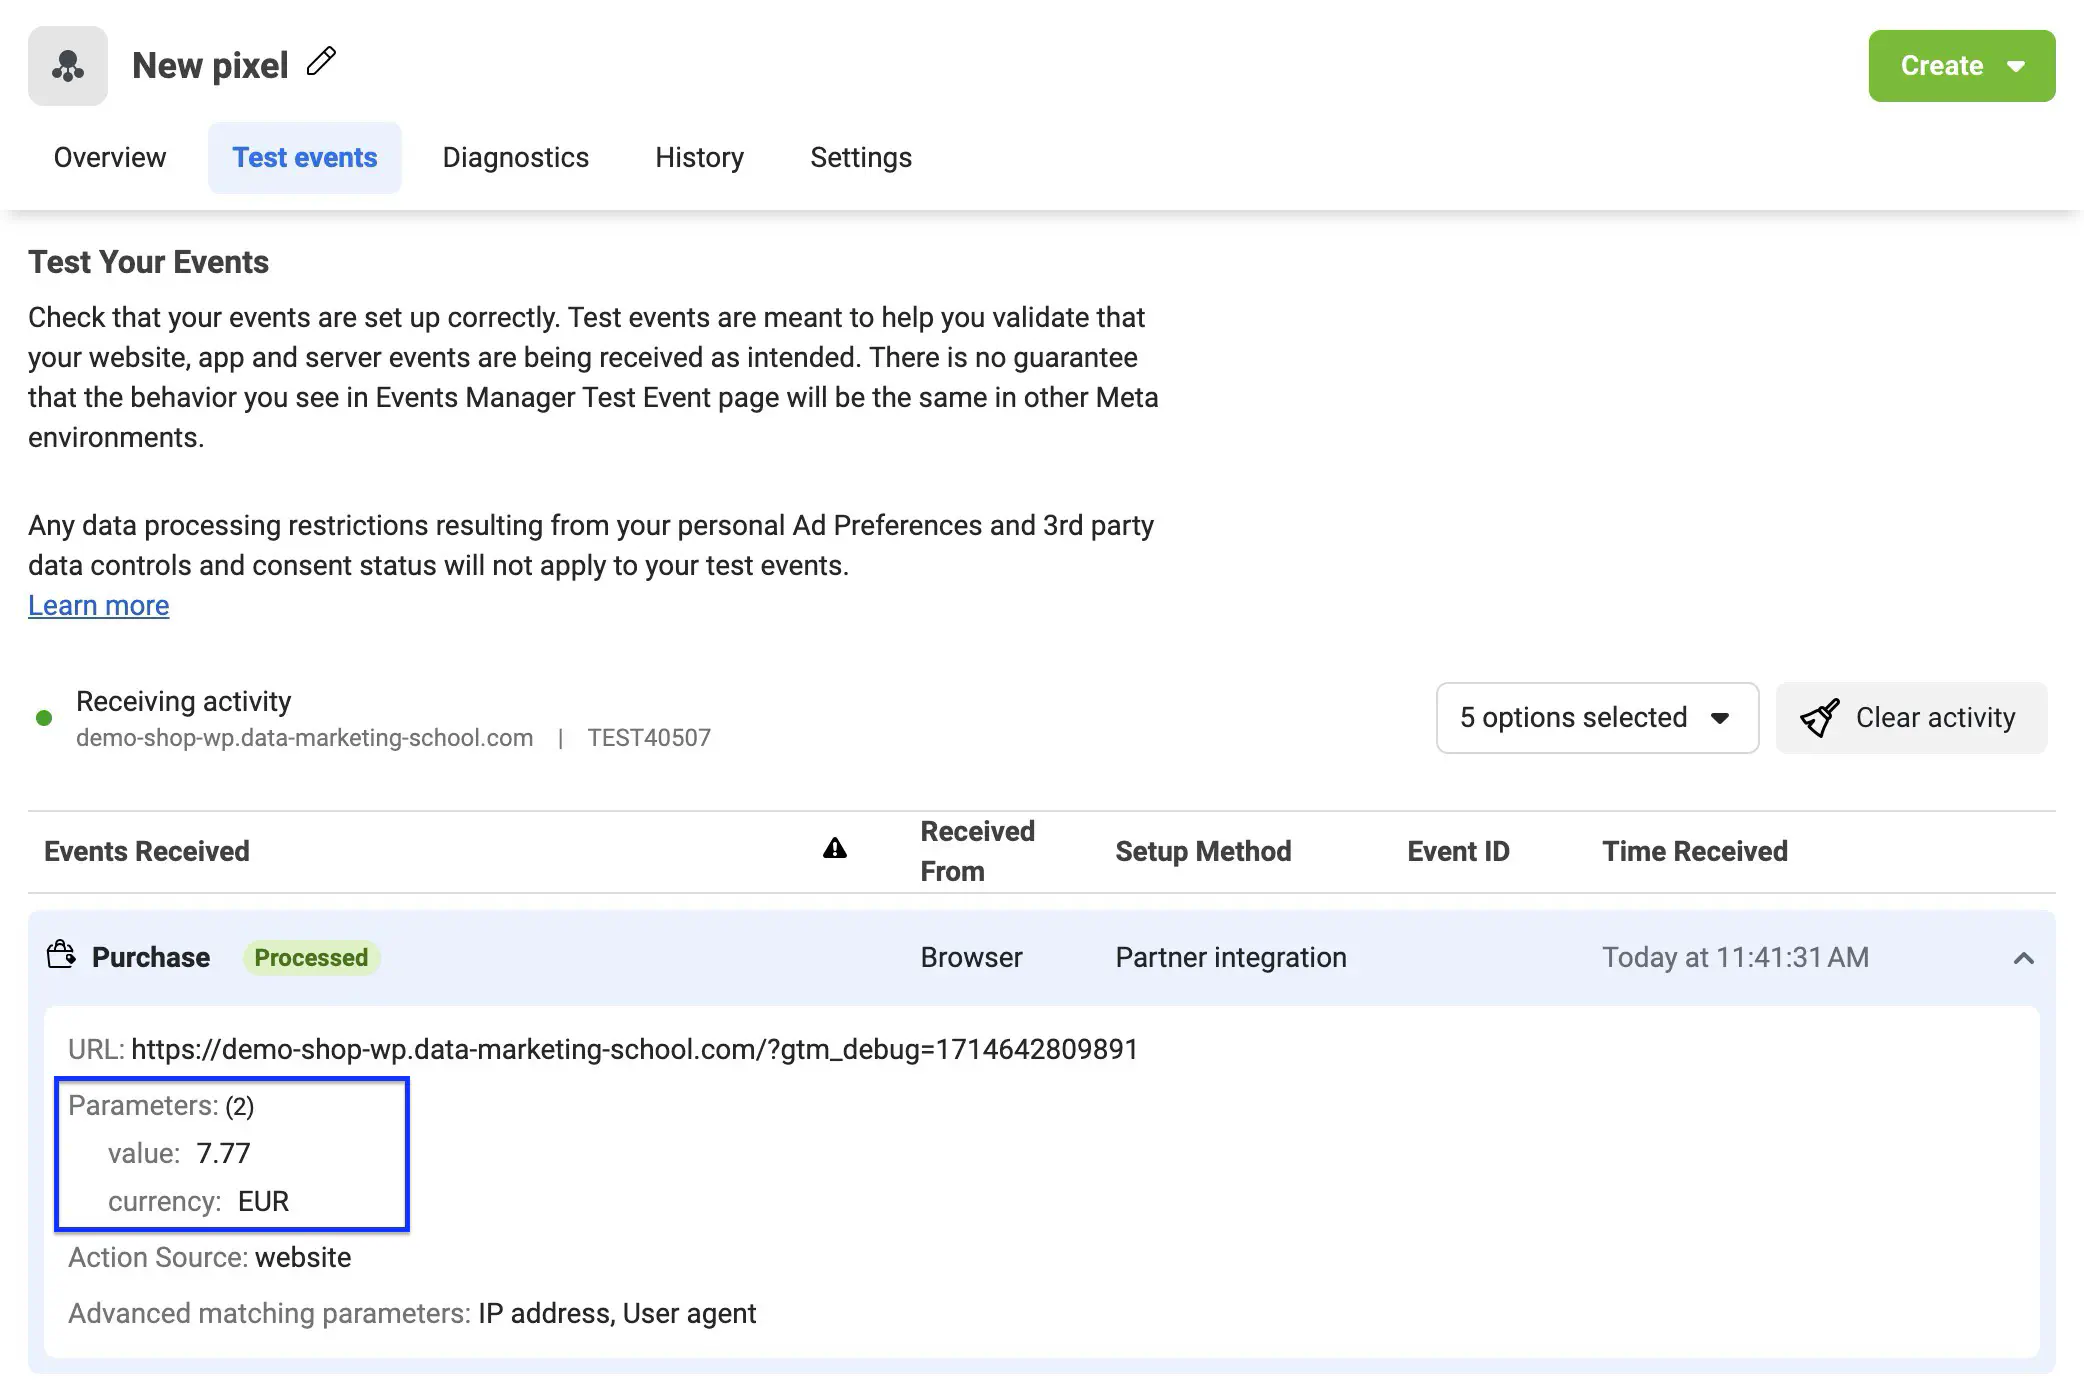
To test that the tag is working properly, you can use the Google Tag Manager debugger and the Meta Pixel Helper extension.
We can see above that the parameters are indeed sent with the Purchase event and in the screenshot just below that these same parameters are indeed received by Meta.
To carry out this check, I went to the event manager and then to the Test events tab.
Add additional data to your events (contents, content_ids) to benefit from the Meta Advantage+ catalog
To find out more about the Meta Advantage+ catalog: https://www.facebook.com/business/help/397103717129942
Adding content_ids from GA4’s e-commerce Data Layer
Useful resources :
GA4’s e-commerce data layer provides a product table called items .
This items array contains the item_id key that we’ll need to send to Meta for each product.
The format required for product identifiers to be properly understood by Meta is a Javascript array of strings .
Here’s an example: [“id_765”, “id_543”, “id_123”] .
For this tutorial, we’ll start with this Data Layer:
dataLayer.push({ ecommerce: null });  // I delete the old ecommerce object
dataLayer.push({
  event: "purchase", // event name
  ecommerce: {
    // event parameters
    currency: "EUR",
    value: 29.99,
    coupon: "FLASH",
    transaction_id: "154561",
    shipping: 4.48,
    tax: 5.99,
    items: [ // products in the order when this event is fired
        {
            // products parameters
            item_id: "4561897",
            item_name: "T-shirt Iron Man",
            price: 29.99,
            quantity: 19
        },
        {
            item_id: "4561898",
            item_name: "T-shirt Batman",
            price: 29.99,
            quantity: 19
        },
        {
            item_id: "4561899",
            item_name: "T-shirt Thor",
            price: 29.99,
            quantity: 19
        },
        {
            item_id: "4561900",
            item_name: "T-shirt Captain America",
            price: 29.99,
            quantity: 19
        }
    ]
  }
});
To access the items array, we’ll need to create a data layer variable in Google Tag Manager.
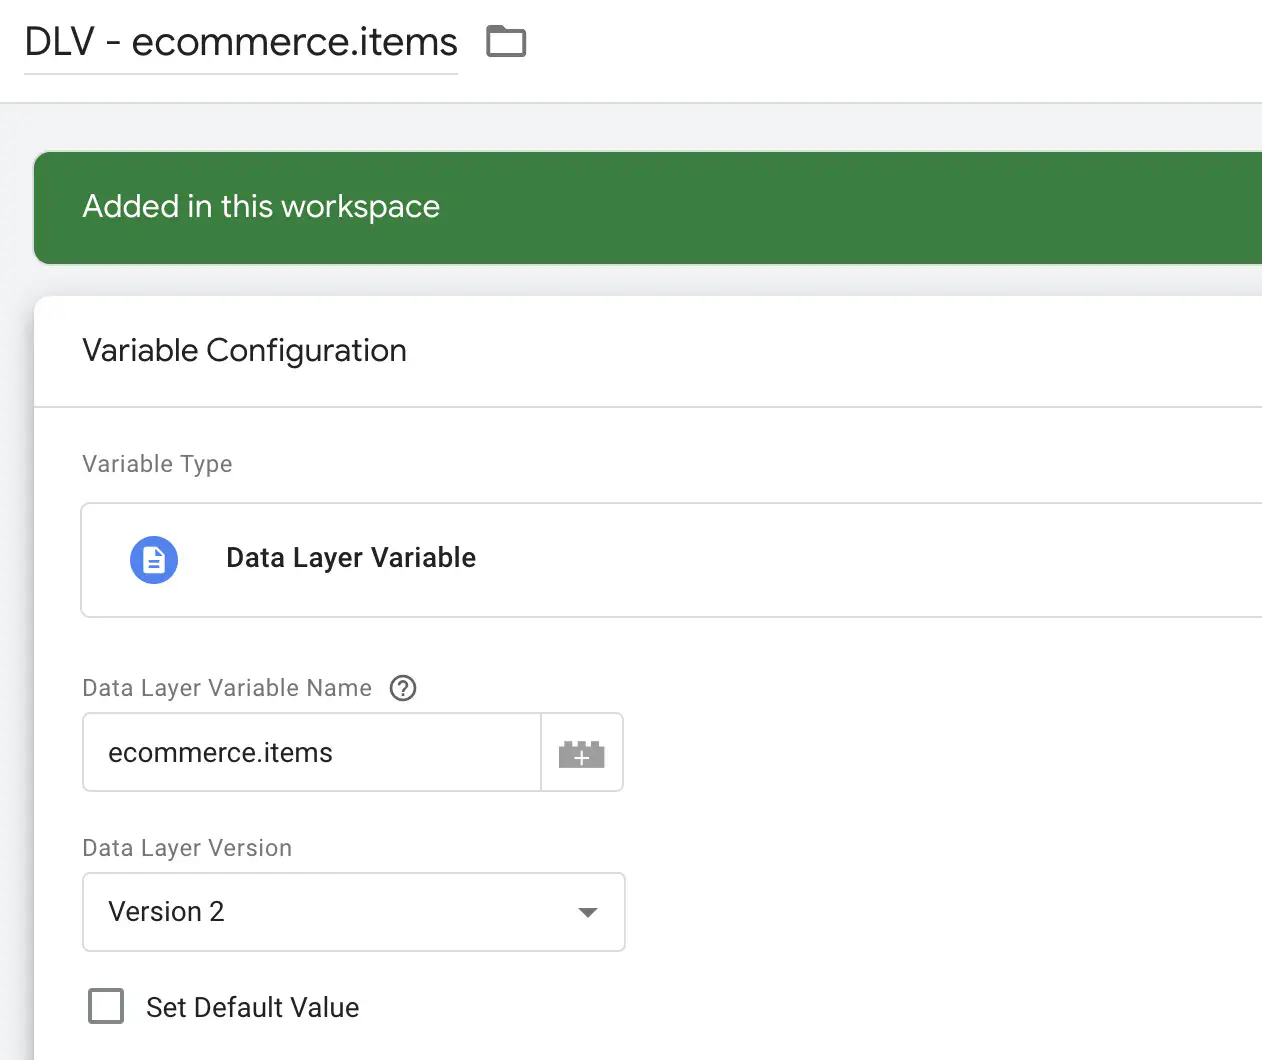
Here, DLV stands for Data Layer Vvariable.
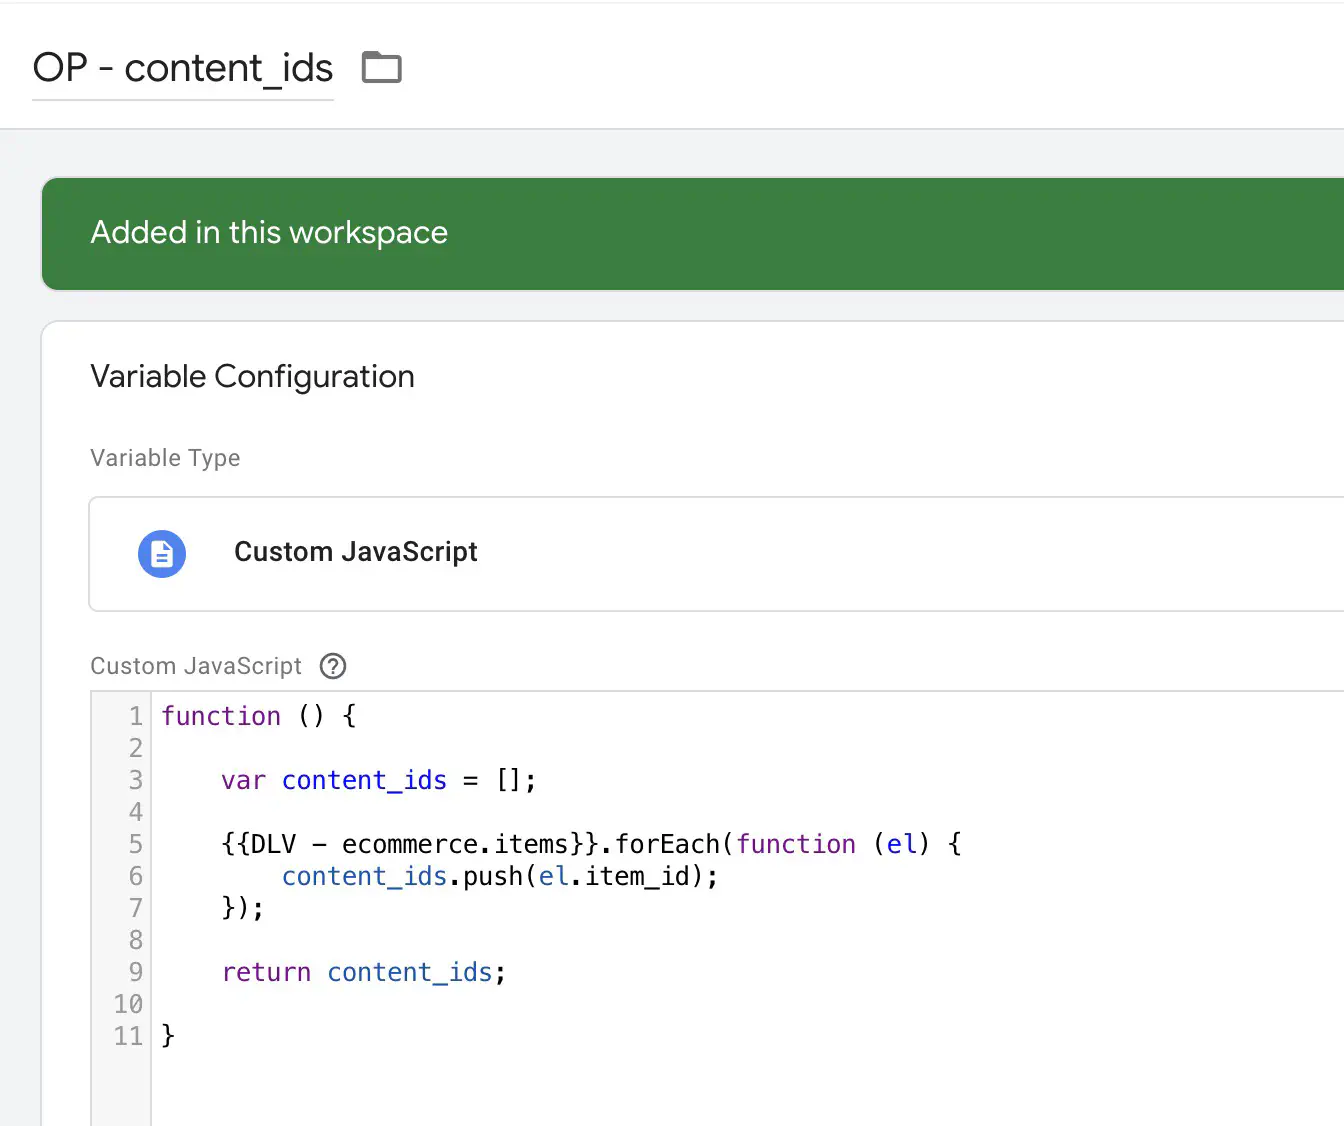
Next, we’ll create a custom Javascript variable into which we’ll insert the following code.
function () {

	var content_ids = [];

	{{DLV - ecommerce.items}}.forEach(function (el) {
	    content_ids.push(el.item_id);
	});

	return content_ids;

}
We name this variable OP - content_ids. OP stands for Object Properties as I’m using the same naming as the Meta reference documentation.
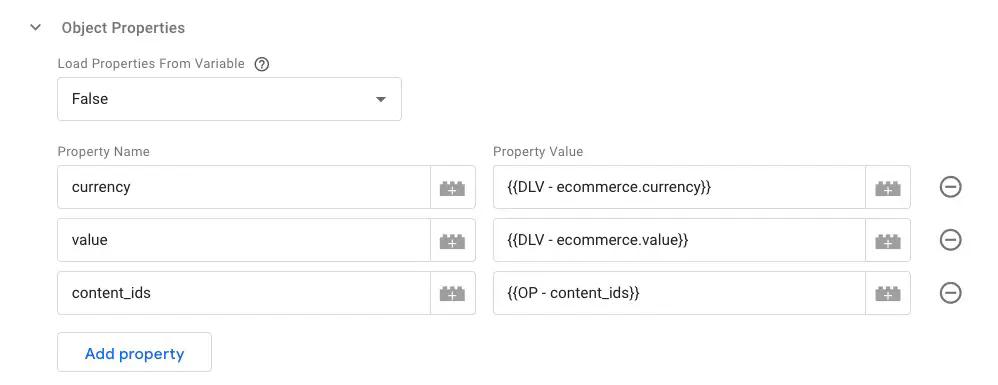
We add the content_ids parameter to the Object Properties of our Meta tag.
We then check in Google Tag Manager’s debug mode that all the information has been correctly sent.
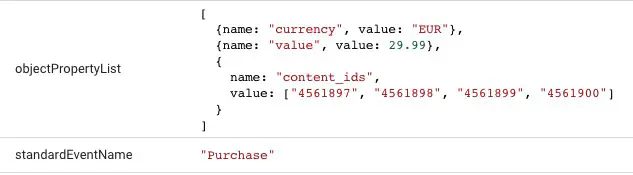
Finally, we check in the event handler of Meta’s Business Manager whether the event has been reported with the correct parameters.

Adding contents from GA4’s e-commerce data layer
The process is the same as explained in the previous section for content_ids. However, the code for the custom JavaScript variable will change.
function() {

	var contents = [];

	{{DLV - ecommerce.items}}.forEach(function(el) {
	    contents.push({ id: el.item_id, quantity: el.quantity });
		});

	return contents;

}
What to do with the data sent to Meta?
Create personalized audiences (or retargeting audiences)
The data collected by the Meta Pixel can be used to identify the behavior of your visitors, enabling you to create audiences based on this behavior.
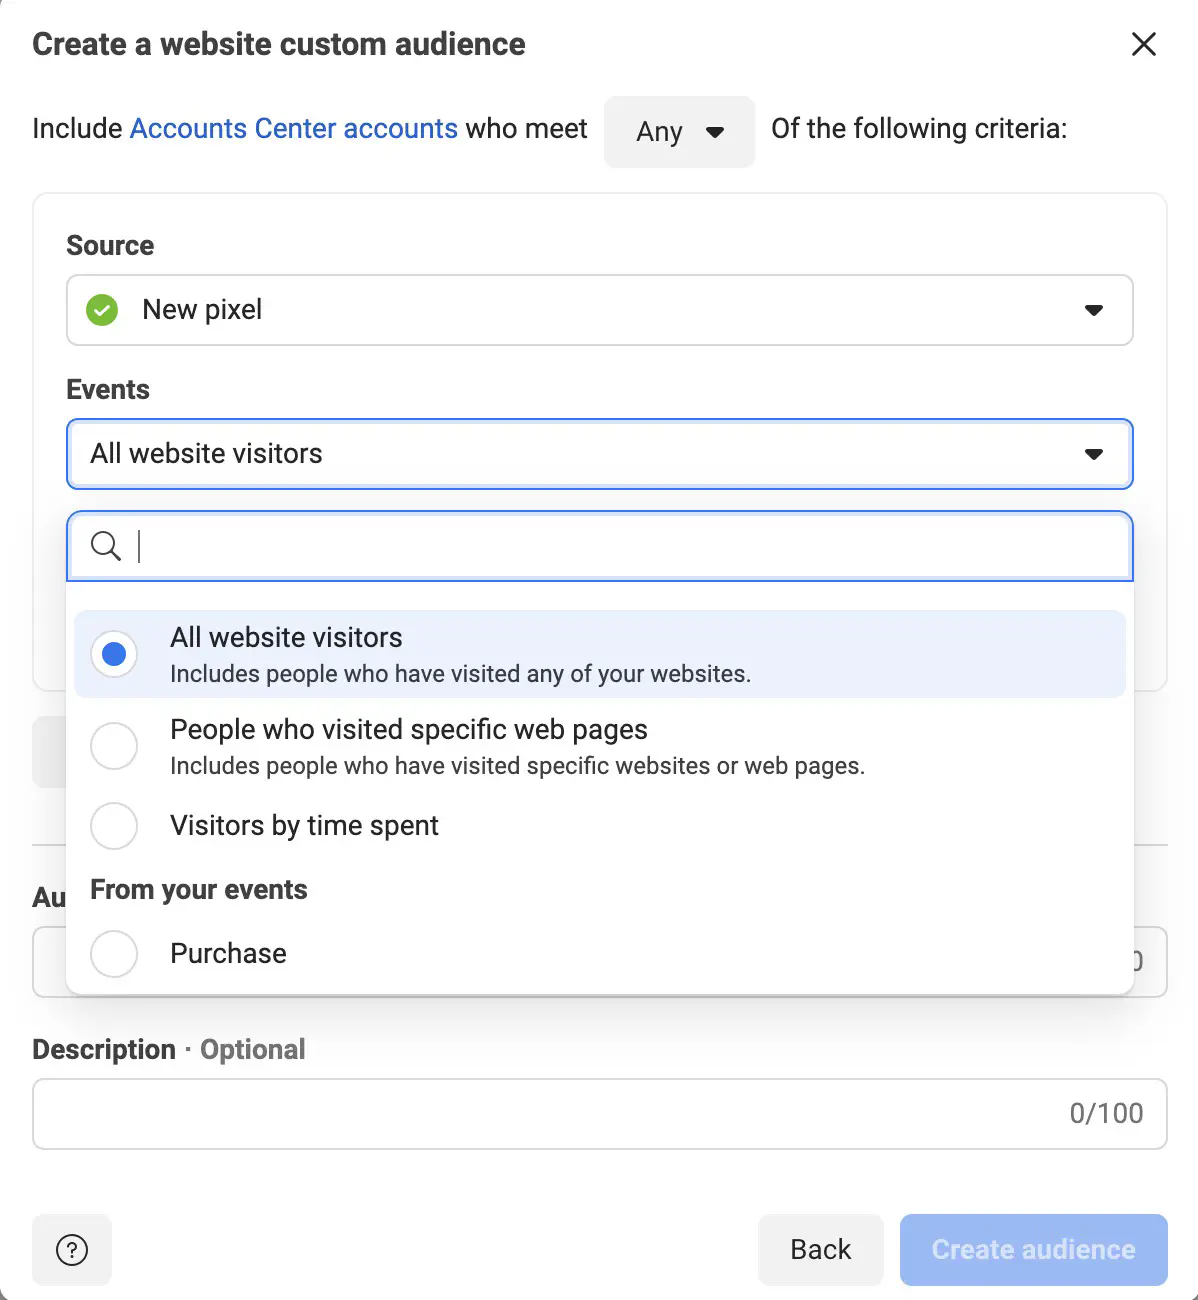
For example, you can create an audience for visitors who have added a product to the shopping cart but haven’t purchased (the so-called abandoned carts).
To do this, go to Audiences > Create an audience > Custom audience > Source: Website in your Business Manager.
Feeding machine learning algorithms
Meta algorithms learn what’s good for your business from the events reported by the Meta Pixel. The more and the better the data from the pixel, the more you can “train” the algorithm to bring you what you want (i.e. sales, leads, awareness, depending on your objectives).
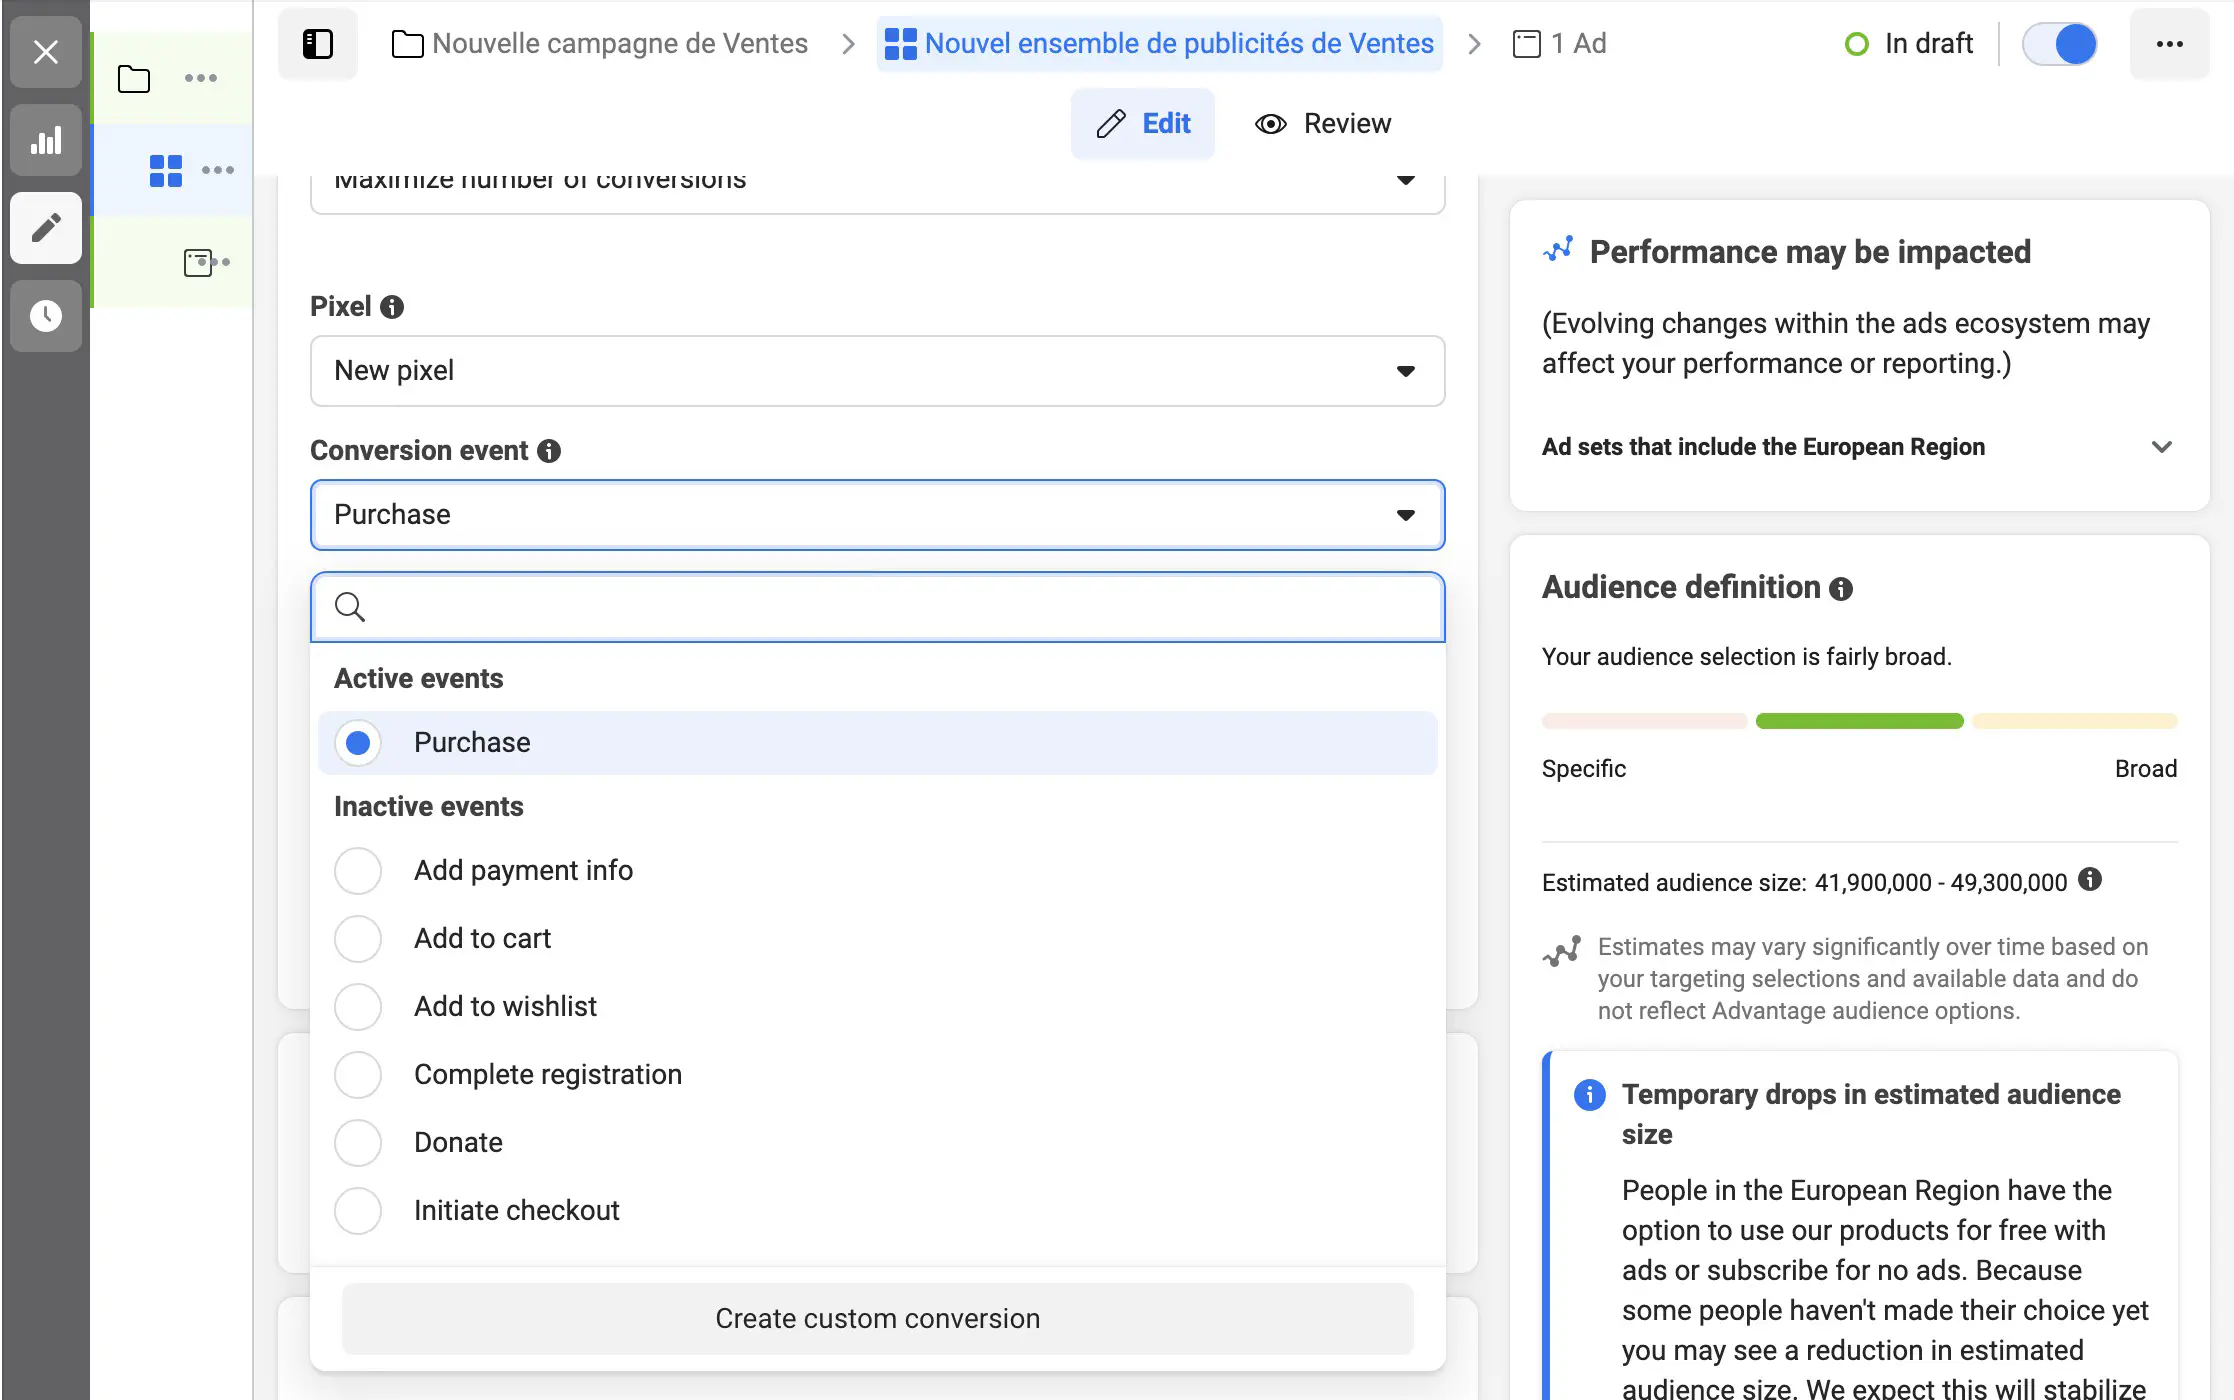
Let’s say your goal is to generate purchases on your site, you can install the Purchase event and set it as a conversion event in your ad sets.
Didn't find what your were looking for?
Get help from the Data Marketing Club
Related posts

Track Elementor Forms with Google Tag Manager
How to accurately track Elementor forms with Google Tag Manager?
2 min read

Set up Consent Mode V2 with Cookie Yes
I'll show you how to implement Consent Mode V2 with CMP Cookie Yes in basic and advanced modes.
4 min read

GTM Server-Side: The Complete Guide
The aim of this article is to give you all the keys you need to determine whether a server-side solution is right for your company, and also the steps you need to take to implement it.
9 min read

Google Ads website phone call conversion tracking with Google Tag Manager
When you display your phone number on your website, your leads can copy the phone number to call you without necessarily interacting with your website.
3 min read

Track Hubspot Meetings iframe with GTM
Hubspot lets you to integrate a meeting scheduler on your website through an iframe. Here is how to trigger an event when a new meeting is booked.
3 min read

Google Ads Conversion Tracking with Google Tag Manager
Tracking conversions will enable Google Ads' machine learning algorithms to fully understand the typical lead who performs the desired action, and thus optimize ad delivery so that this conversion action happens more and more.
5 min read