Install Matomo on Docker with Docker Compose
Updated: Friday, November 10, 2023
Install Docker
Before you start, you need to install Docker on your computer if not already installed.
To check whether Docker is on your system, type the command docker -v in a terminal.
If the command can’t be found, then you don’t have Docker and you need to install it.
Installing Docker depends on the operating system you’re working on.
Here are some tutorials from Docker:
Create the docker-compose.yml file
The docker-compose.yml file contains all the information needed to allow Docker to download the essential elements for Matomo to work, such as:
- a web server (apache2)
- a SQL database (mariadb)
- a programming language (php)
Create this file in a matomo directory on your system.
mkdir matomo
touch matomo/docker-compose.yml
Then add the following configuration to your docker-compose.yml file.
version: "3"

services:
  db:
    image: mariadb:10.11
    command: --max-allowed-packet=64MB
    restart: always
    volumes:
      - db:/var/lib/mysql:Z
    environment:
      - MYSQL_ROOT_PASSWORD=password123*
      - MARIADB_AUTO_UPGRADE=1
      - MARIADB_DISABLE_UPGRADE_BACKUP=1

  app:
    image: matomo
    restart: always
    volumes:
      - matomo:/var/www/html:z
    environment:
      - MATOMO_DATABASE_HOST=db
    ports:
      - 8080:80

volumes:
  db:
  matomo:
Then, to start Matomo, you need to run the docker compose up command.
Docker will download all the files needed to run Matomo and then start the application.
After a few minutes, you can access Matomo at http://localhost:8080.
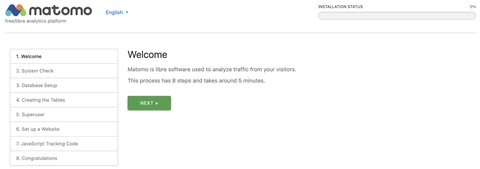
Matomo installation process
Database connection
In the docker-compose.yml file above, there is an environment variable called MYSQL_ROOT_PASSWORD. This variable contains the database connection password (password123* here).
Here are the connection details I enter into Matomo so that it can connect to the database:
- Database server: usually the IP address of the database server. Since we’re using Docker here, we enter the name of the database service (see
services: db:indocker-compose.yml). - Username: we haven’t specified a username in the Docker Compose, so this will be
root. - Password: value of the
MYSQL_ROOT_PASSWORDenvironment variable. - Database name: here you put whatever you want as the database name.
- Table prefix: this is what your tables will be prefixed with.
- Adapter: PDO\MYSQL
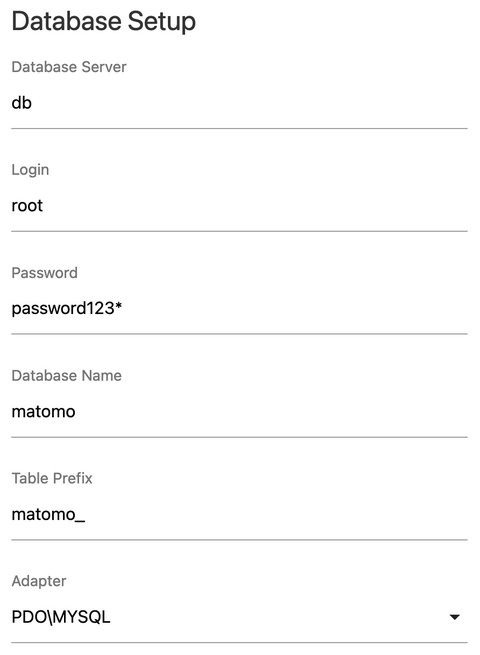
Click next and then you should see this confirmation message:

Super user and website configuration
Next, you need to create a Super User account with:
- a username
- a password
- an email address
Then set up your website with :
- site name
- site URL
- time zone
- whether it is an e-commerce site
At the end of the installation process, you will be asked to install the tracking code on your website.
Matomo sign-in
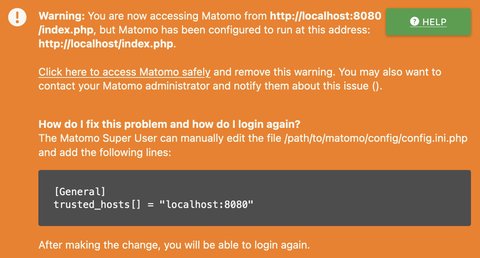
When you try signing in to Matomo, you’ll see this error message if you’ve used the same docker-compose.yml as me.
This is a security feature that blocks access if you’re not on port 80. Here we’re connecting with port 8080 so we need to modify the configuration file in Matomo in Docker.
Edit Matomo configuration in Docker
To access the Docker container in which matomo is located, you need to know the identifier of the corresponding container. To do this, run the docker ps command.

In my case, the Matomo container ID is 670e5185880a.
I’m now going to run a terminal in this container to edit the Matomo configuration file with the following command.
Replace 670e5185880a with your own container ID
docker exec -it 670e5185880a /bin/bash
Now that I’m in the Matomo container, I can edit the config.ini.php configuration file.
To do this, I’ll need a text editor, so I’ll install nano with the command apt update && apt install nano.
Then type nano config/config.ini.php, then change the line trusted_hosts[] = "localhost" to trusted_hosts[] = "localhost:8080". Hit Ctrl-X to close, then hit Enter to save.
Then reload your Matomo login page.
You will be on the sign-in form.
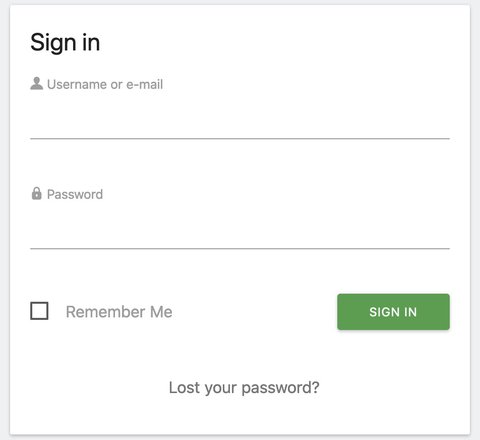
Congratulations, you installed Matomo on Docker.
